
Note :- Before configuring Node, java should be installed in remote server.
Step 1) Click on "Manage Jenkins"

Step 2) Click on "Manage Nodes and Clouds"

Step 3) Click on "New Node"

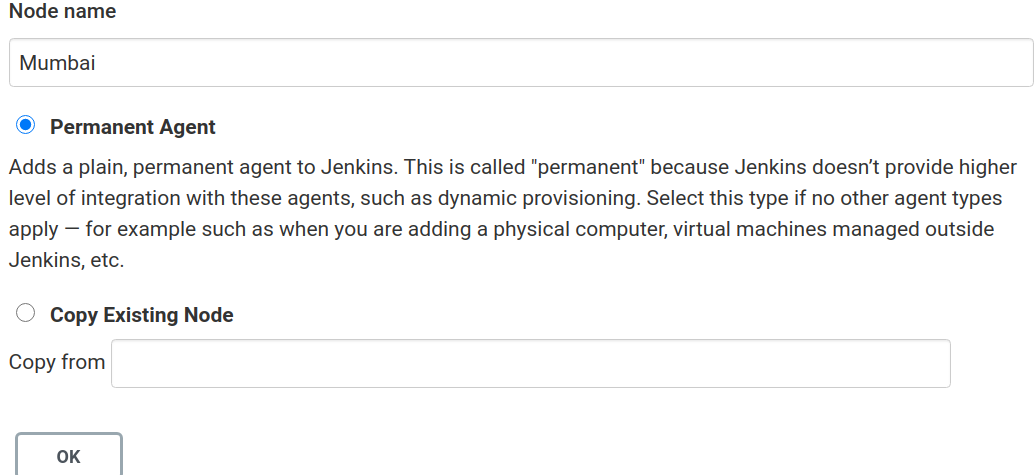
Step 4) Write the Node Name and Select "Permanent Agent"
Step 5) Write the "Remote root directory path"
- Remote root directory path - Is your remote server location where code will deploy

Step 6) Write the labels
- Labels (or tags) are used to group multiple agents into one logical group.

Step 7) Go to "Launch method" and select "Launch Agent via SSH"

a) Write the Host (host will be remote server ip address)

b) Go to Credentials and click on add >> Jenkins

c) write the user_name and Password and click on add

d) Drop Down in None and select Credential

Step 8) Go to "Host Key Verification Strategy" and select "manually trusted Key Verification Strategy"

Step 9) Click on save

Step 10) Click on Created node and click on launch agent


Step 11) Click on job >> click on configure


Step 12) Go to General tab >> tick on "Restrict where this project can be run" and select label

Step 13) Save the job and click on build now
Check your code is deployed on remote server under /home/ubuntu/
If you want to deploy your code in /var/www/html/ so use crontab like as below
* * * * * /usr/bin/cp -a /home/ubuntu/workspace/Agent_1/* /var/www/html/
No comments:
Post a Comment
testing