Azure DevOps Server is a Microsoft product that provides version control, reporting, requirements management, project management, automated builds, testing and release management capabilities. It covers the entire application lifecycle, and enables DevOps capabilities.
In this tutorial we will configure CI/CD
Step 1) Select A Project

Step 2) Click on Branch >> Create New Branch
Push the code according your requirement

Configure Continues Integration (CI) Process
Step 3) Click on pipelines >> Click on pipelines >> Click on "create new pipeline"

Step 4) Click on "Use the classic editor"

Step 5) Click on continue

Step 6) Click on Empty job

Step 7) Click on pipeline >> Drop down on "Agent Specification" and select Operating System


Step 8) Click on agent job >> Click on "+" Symbol >> Search "copy files" >> click on add

Step 9) Search "archive files" and add

Step 10) Search "publish build artifacts" and add

Step 11) Click on Archive >> copy text under "Archive file to create" >> untick on "Prepend root folder name to archive paths"

Step 12) Click on "Publish Artifact" >> Paste text under "Path to publish"

Step 13) Click on Archive >> copy text under "Root folder or file to archive"

Step 14) Click on "copy files" >> Paste text under "Target Folder"

Step 15) Click on save & queue >> click on "save and run"


Configure Continues Development (CD) Process
Step 1) Click on pipeline >> Click on Release >> Click on new pipeline

Step 2) Click on "Empty job"

Step 3) Click on "Add an artifact" >> drop down in "Source (build pipeline)" >> Click on add

Step 4) Click on "electricity symbol" >> and Enable it

Click on "1 job,0 task"

Step 5) Click on Agent job >> drop down in "Agent Specification" and select OS

Step 6) Click on Agent job >> Click on "+" symbol >> search "copy files over ssh" and add

Step 7) Click on manage >> click on "Create service connection"


Step 8) Search "ssh" >> click on next

Step 9) Fill below following details
Host name ---- server ip address
Port number ---- ssh port number
User name ---- ubuntu
Password ----
Service connection name ---- testing-ssh-connection
click on save

Step 10) Click on job 1 >> and rename "Copy Code Over SSH" >> drop down in "SSH service connection" and select >> click on three dot in "Source folder"

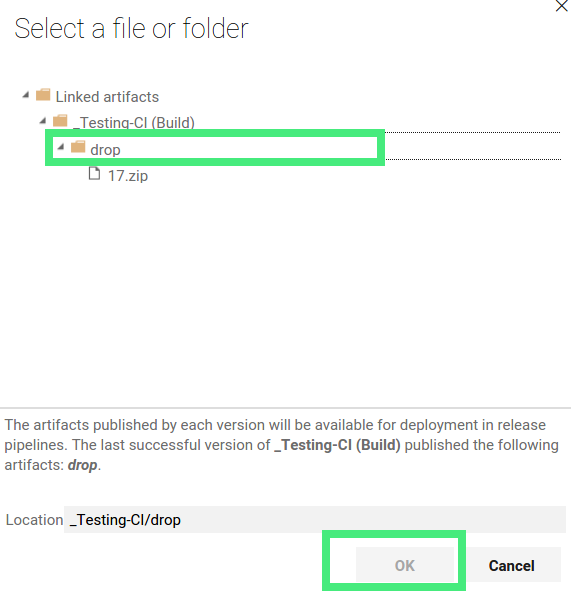
Step 11) Select "Drop" >> and click on OK >> write document root path under "Target folder"

Step 12) Click on "+" symbol >> Search "ssh" and add 2 times

Step 13) Click on job 2 >> and rename "Extract Code" >> Drop down in "SSH service connection" and select >> write the Extract command "unzip -o /var/www/html/*.zip -d /var/www/html/"

Step 14) Click on job 3 >> and rename "Delete Unused Code" >> Drop down in "SSH service connection" and select >> write the Delete command "rm -rf /var/www/html/*.zip"

Step 15) Click on save and ok >> Click on "Create Release" >> Click on create


No comments:
Post a Comment
testing